 Pin this
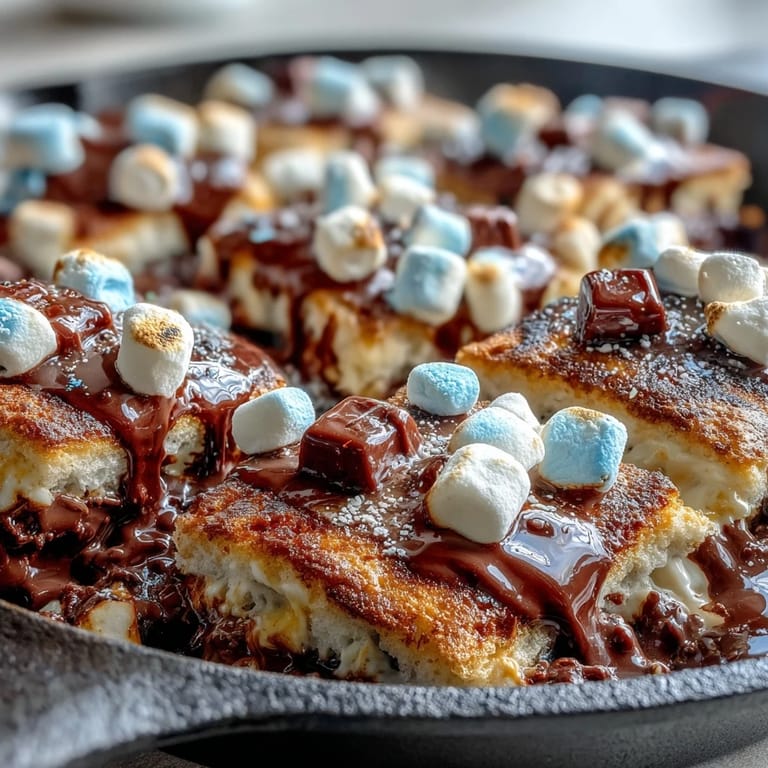
 Last summer, my neighbor showed up to our Fourth of July cookout with a cast iron skillet and a wild idea to skip the campfire setup entirely and make s'mores indoors. Twenty minutes later, we were passing around melted chocolate and toasted marshmallows like it was the most elegant dessert ever created, watching the blue and red candies catch the kitchen light. That one moment completely changed how I think about holiday entertaining, and honestly, it might be the easiest way to feed a crowd something that tastes like pure nostalgia and celebration all at once.
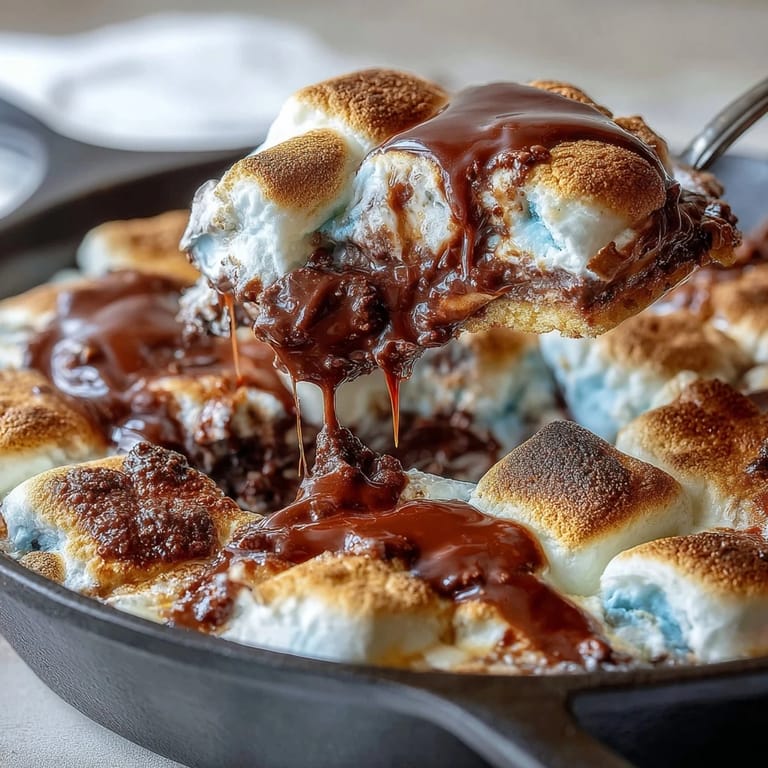
I've made this dip probably a dozen times now, and the moment that sticks with me most is watching my mother-in-law's face when she realized the marshmallows on top turned golden and crispy while staying soft underneath. She kept saying it was impossible to get that texture any other way, and then she grabbed another graham cracker without asking. That's when I knew I'd nailed it—when people are too busy eating to compliment the cooking.
Ingredients
- Semi-sweet chocolate chips (2 cups): These are your foundation, and the butter is what makes them silky instead of grainy when they melt—I learned this the hard way by skipping the butter once and ended up with a slightly seized mess.
- Unsalted butter (1 tablespoon): This small amount is crucial because it keeps the chocolate from becoming too thick as it cools, and it prevents the bitter flavor that salted butter sometimes adds.
- Large marshmallows (3 cups or enough to cover): Fresh marshmallows make a huge difference—older ones can brown too quickly without puffing up the way you want them to.
- Graham crackers (16 pieces, broken): Breaking them by hand instead of cutting keeps the texture more interesting and gives people options for how much dip they want per bite.
- Red, white, and blue chocolate candies (1/4 cup, optional): These melt slightly into the warm marshmallows and add both flavor and that festive visual moment that makes people smile when they first see the skillet.
- Strawberries and blueberries (1 cup each, optional): Fresh fruit cuts through the richness and gives you something to offer people who might want to feel a little less guilty about dessert.
Tired of Takeout? 🥡
Get 10 meals you can make faster than delivery arrives. Seriously.
One email. No spam. Unsubscribe anytime.
Instructions
- Heat your oven and prep your skillet:
- Set the oven to 400°F and make sure your cast iron is clean and dry—any moisture can mess with how the chocolate melts. Have your marshmallows counted and ready because once the chocolate hits the pan, you'll want to work quickly.
- Melt the chocolate and butter together:
- Place both right in the center of your cold skillet, then slide it into the oven for 3 to 4 minutes until you can see the chocolate starting to soften. The butter helps it melt evenly, so when you pull the skillet out (careful, it's hot), you'll stir it all into a smooth, glossy layer.
- Arrange marshmallows in an even layer:
- Working quickly while the chocolate is still warm, nestle each marshmallow close together so they cover the entire surface—this prevents the chocolate from being exposed to too much heat when the skillet goes back in. If you have gaps, the edges can scorch.
- Toast until golden:
- Back into the oven for 5 to 7 minutes, watching through the window because marshmallows can go from perfect to burnt in about thirty seconds. You're looking for the tops to turn a deep golden color with hints of brown in the peaks.
- Add festive toppings and cool slightly:
- Pull the skillet out and sprinkle your candies over the warm marshmallows if you're using them—the warmth will just barely soften them enough to look intentional. Let everything rest for 3 to 5 minutes so it firms up just enough to handle without burning your fingers.
 Pin this
 There was this one Fourth of July where the power flickered right as the marshmallows were toasting, and we all froze thinking the worst. The oven stayed on, the dip finished perfectly, and everyone at the table laughed and cheered like we'd just won something. It's a silly thing, but it reminded me that this dessert has this way of bringing people together in the moment, making whatever's happening around you feel less important than the warm chocolate and marshmallow you're sharing.
The Cast Iron Advantage
Using a cast iron skillet for this is brilliant because the metal distributes heat so evenly that you don't get hot spots where the chocolate burns or cool corners where the marshmallows stay pale and undertoasted. Plus, the skillet stays warm long enough that people can keep dipping and eating for a solid 10 to 15 minutes after you pull it from the oven. If you don't have cast iron, a ceramic baking dish works, but you'll lose some of that heat-retention magic that makes this dessert special.
Making It Your Own
The base recipe is intentionally simple so you can riff on it without overthinking things. I've seen people add a thin layer of peanut butter under the marshmallows, swap in dark chocolate for a less-sweet experience, or even sprinkle crushed cookies over the top for extra texture. The only rule that matters is not skipping the butter, because that's what makes the chocolate melt like silk instead of seizing up.
Serving and Storage
The best part about making this in a skillet is that it's both the cooking vessel and the serving dish, so there's no transferring or compromising the texture. You can keep the skillet warm on a trivet in the center of the table and let people graze throughout the gathering. If by some miracle you have leftovers, cover the skillet loosely and let it sit at room temperature—trying to reheat it in the oven will just make it tough.
- Serve warm with graham crackers for dunking and fresh fruit for balance.
- Set out small appetizer plates so people can grab what they want without hovering over the skillet.
- Keep oven mitts nearby because the skillet stays hotter than people expect, and burned fingers are never the dessert memory you want.
 Pin this
 This dip tastes like summer, celebration, and the easiest way to make people genuinely happy all at once. It's the kind of dessert that reminds you why gathering around food matters.
Recipe Questions
- → What type of chocolate works best for this dip?
Semi-sweet chocolate chips melt smoothly and provide a rich, balanced flavor ideal for this dip.
- → Can I use a skillet other than cast iron?
While a cast iron skillet retains heat well and helps with even cooking, an oven-safe baking dish can be used as an alternative.
- → How do I prevent the marshmallows from burning?
Bake the marshmallows until just golden and toasted, typically 5-7 minutes, and watch closely to avoid burning.
- → Are there any suggested dippers aside from graham crackers?
Fresh strawberries and blueberries add a refreshing contrast, and other sturdy cookies or sliced fruits can also work well.
- → Can I prepare the dip ahead of time?
It's best served warm and fresh, as the texture changes once cooled, but components can be prepped separately beforehand.