 Pin this
 The first time I whipped up these cheesecake bites was out of pure celebration chaos — graduation balloons bobbing around my kitchen, half my attention on laughter in the next room and the other keeping an eagle eye on the oven timer. There’s something about pressing graham cracker crumbs into tins that makes you feel industrious, even if you’re in party attire. It’s the sort of recipe you can chat through with a friend, catching up between batches and taste-testing the filling more times than you’ll admit. These bites are effortless to make look festive, especially if you have a soft spot for edible sparkle. They’ve quickly become the unspoken star of our end-of-year parties.
I once made these for my cousin’s outdoor graduation, and the freshly cut grass mixed with the sweet scent of baking cheesecake is now forever woven into my spring memories. The mini muffin pan became the talk of the family picnic, as everyone marveled at the tiny “caps” and I confessed how easy it all really was. Watching the kids build their own graduation hats with chocolate and licorice made this dessert as interactive as it was delicious. Plus, there was something gleefully satisfying about handing out little bites that made even adults laugh. A few were gone before they even hit the table.
Ingredients
- Graham cracker crumbs: The base for every classic cheesecake — I like to use the food processor for the finest crumb and always sneak a taste to check for sweetness.
- Granulated sugar: Blended into both the crust and filling, it creates the perfect sweet balance — don’t be shy about tasting your crumb mixture before pressing it in.
- Unsalted butter, melted: Binding the crumbs means no dry crust — let it cool a minute so it doesn’t melt your paper liners.
- Cream cheese, softened: Leave it out for an hour so you avoid lumps — trust me, cold cream cheese leads to marathon mixing sessions.
- Eggs: Room temperature eggs blend in seamlessly for silky filling — I crack them in a separate bowl just in case.
- Pure vanilla extract: One teaspoon turns the filling aromatic and rich — the difference between bland and luscious.
- Sour cream: Sneaky ingredient gives tang and ultra-creamy texture — don’t skip it if you want bakery-worthy bites.
- Pinch of salt: Never underestimate salt in dessert — it sharpens all the flavors beautifully.
- Whipped cream (optional): Cloud-like topping for a light finish — I pipe it on right before serving to keep it fluffy.
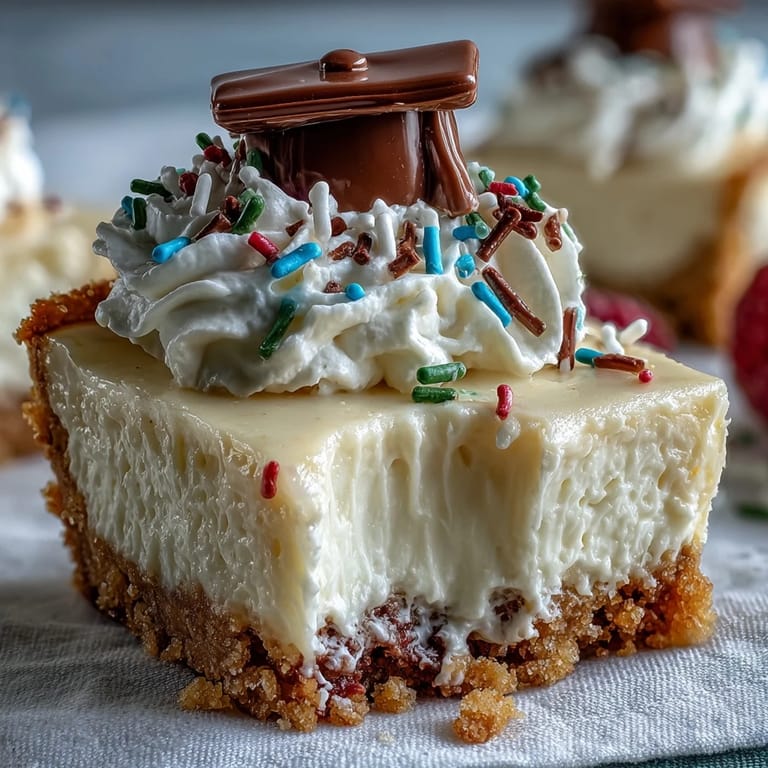
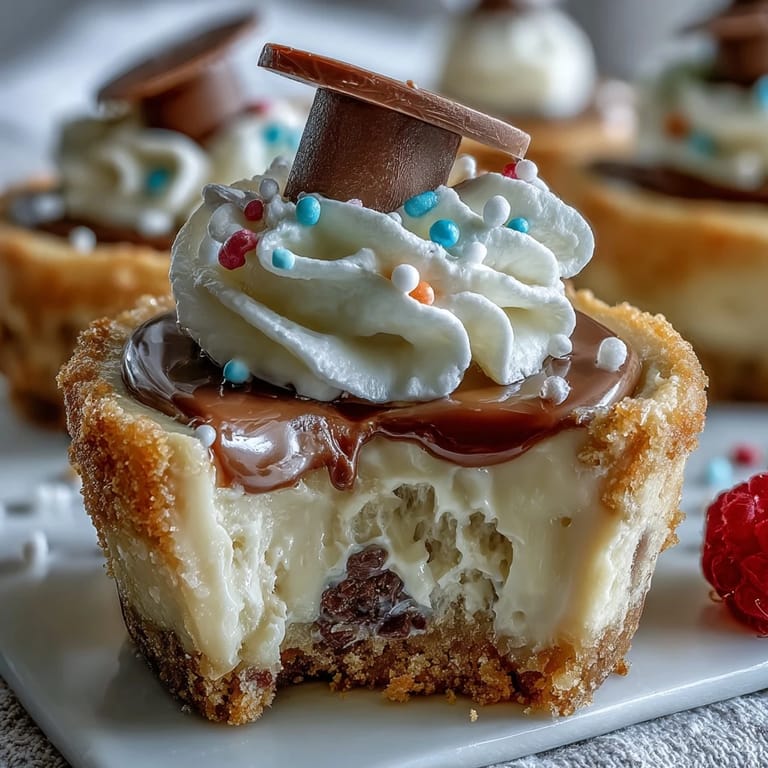
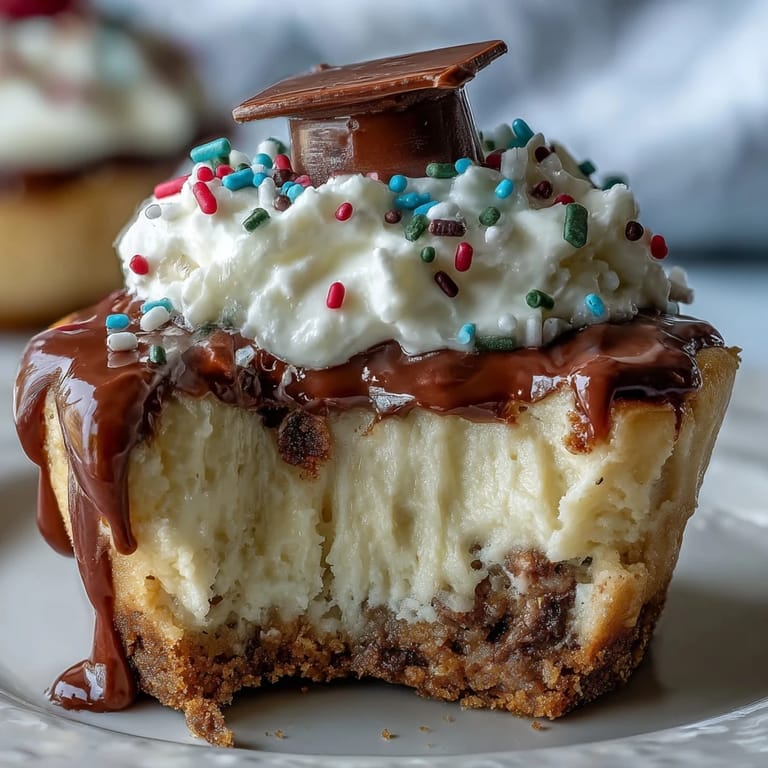
- Festive sprinkles or mini chocolate graduation caps: These bring the party to each bite — even simple sprinkles make them pop with color.
- Fresh berries (optional): A juicy burst for those who love fruit with their cheesecake — use what’s brightest at the market for a real treat.
Tired of Takeout? 🥡
Get 10 meals you can make faster than delivery arrives. Seriously.
One email. No spam. Unsubscribe anytime.
Instructions
- Prepare the pan:
- Preheat your oven to 325°F and line a mini muffin tin with paper liners — you’ll feel like you’re prepping dozens of tiny presents.
- Mix and press the crust:
- Stir together graham crumbs, sugar and melted butter in a bowl until it feels like wet sand. Spoon a tablespoon into each cup and press it with your fingers (or a small glass) until compact.
- Bake the crust:
- Slide the pan into the oven for about 5 minutes, just enough for the crusts to set and the kitchen to smell toasty. Let them cool while you work on the filling — patience is a virtue.
- Make the cheesecake filling:
- In a large bowl, beat softened cream cheese until velvety and smooth. Add sugar and mix until it looks light; then beat in eggs one at a time, followed by vanilla, sour cream and a pinch of salt.
- Fill the cups:
- Divide batter among the prepared crusts almost to the top — a cookie scoop works wonders for this. Each cup should feel satisfyingly full.
- Bake:
- Return the pan to the oven for 13–15 minutes. Centers will look barely set and still have a gentle jiggle in the middle.
- Cool:
- Cool in the pan for 10 minutes, then move bites to a wire rack. Let them cool fully before a quick chill in the fridge for at least half an hour.
- Decorate and serve:
- Right before your big reveal, dollop or pipe whipped cream and finish with festive toppings or fresh berries. Step back and admire your handiwork — photo op mandatory!
 Pin this
 The moment I saw my little cousin, mortarboard hat askew and a big grin, gleefully popping one of these into her mouth, I knew these cheesecake bites had earned graduation-day tradition status in our family. Sometimes, it’s the smallest desserts that carry the biggest memories.
Making Mini Cheesecake Bites Extra Special
I learned that a single, bright berry or a handmade chocolate “cap” instantly turns simple bites party-ready — it’s amazing how just a touch of color or whimsy makes guests light up. Setting out toppings for people to add their own sparks silly, happy conversations around the dessert table. The flexibility lets you theme these bites for any season, and even a last-minute sprinkle adds flair.
Customizing For Every Palate
Want to switch things up? Swap chocolate cookie crumbs for the classic graham crust or stir a swirl of raspberry jam into the batter before baking for a fruity punch. I’ve even tried a hint of lemon zest in the filling for a sunnier taste, and it was a hit from the very first bite.
Troubleshooting and Party Pacing
If the filling looks lumpy, let the cream cheese rest at room temperature longer — rushing never helps! Bake the crusts ahead if you’re in a hosting whirlwind so the assembly feels breezy. Make sure the bites are fully chilled before topping, especially when the room fills with warmth from happy guests.
- If a few bites stick to the liner, peel gently from the bottom to keep them intact.
- Bring the pan straight to the table so guests can pick their favorite topping.
- Don’t forget to sneak a bite for yourself before they vanish!
 Pin this
 However you decorate them, these creamy, dreamy cheesecake bites guarantee a little moment of celebration in every mouthful. Bake a batch and watch your party glow a little brighter.
Recipe Questions
- → How can I tell when the bites are done?
The centers should look set but still have a slight jiggle; edges will be firmer. Remove from oven when the jiggle is minimal, cool in the pan 10 minutes, then chill to finish setting.
- → How do I prevent a soggy crust?
Press the crumb mixture firmly into the liners and prebake for about 5 minutes to set the crust. Let the crust cool slightly before adding the filling to avoid moisture seeping in.
- → Can I make these ahead of time?
Yes. Bake and chill the bites up to 24 hours ahead. Store covered in the fridge and add whipped cream and decorations just before serving to keep toppings fresh.
- → What are good substitutions for the crust?
Swap graham crackers for chocolate cookie crumbs or gluten-free cookie crumbs for a gluten-free option. Adjust melted butter to bind the crumbs until they hold when pressed.
- → How can I avoid cracks on top?
Mix gently and avoid overbeating once eggs are added. Bake at a moderate temperature and remove when centers are just set; rapid cooling and excessive mixing can cause cracks.
- → Ideas for graduation-themed decorations?
Use a small dollop of whipped cream, top with sprinkles, fresh berries, or place a mini chocolate square and a short licorice string to mimic a graduation cap.