 Pin this
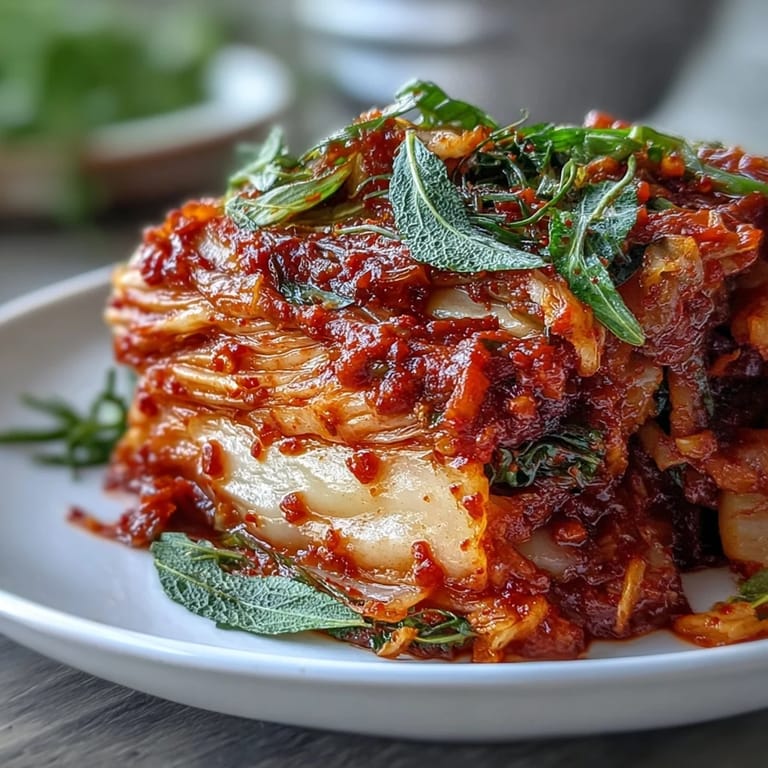
 My kitchen smelled like a Korean grandmother's pantry the first time I decided to make kimchi from scratch—not because I knew what I was doing, but because I'd borrowed every jar I could find and lined them up on the counter like I was preparing for something sacred. A friend had brought homemade kimchi to dinner weeks before, and I couldn't stop thinking about how the crunch and heat and funkiness all worked together like they'd been planning it. So one Saturday afternoon, armed with a large napa cabbage and absolutely no idea about fermentation timing, I dove in.
I served my first batch to my partner three days in, before it was technically ready, because I couldn't wait anymore and the smell coming from the jars was driving me wild. We ate spoonfuls straight from the container while standing at the counter, and I remember the moment they looked at me and said, "You made this?" with actual surprise. That jar disappeared in two days, and suddenly I was the person everyone asked for kimchi at dinner parties.
Ingredients
- Napa cabbage (1 large head, about 1.2 kg / 2.5 lbs): This is your canvas—use the palest, crispest head you can find because it'll stay crunchy through fermentation and hold onto flavors like a sponge.
- Daikon radish (1 medium, about 200 g, julienned): The secret weapon that nobody talks about; it adds peppery notes and stays snappy even after weeks of fermentation.
- Scallions (4, sliced): Don't skip these—they soften into the background and add a subtle oniony depth that rounds everything out.
- Carrot (1 medium, julienned, optional): A touch of sweetness that balances the heat, and it adds visual warmth to your jars.
- Coarse sea salt (80 g / 1/3 cup): The salt breaks down the cabbage's cell walls so it becomes tender and absorbs the spice paste like a dream.
- Cold water (1.5 liters / 6 cups): Use filtered water if you have it; chlorine can interfere with fermentation.
- Garlic (6 cloves, minced): Fermented garlic becomes mellow and sweet, so don't hold back here—this is not a place for shyness.
- Fresh ginger (1 thumb-sized piece, peeled and minced): The warmth it brings develops and deepens as kimchi ages, becoming almost honeyed.
- Small onion (roughly chopped): This melts into the paste and adds a subtle sweetness that most people can't quite identify but love.
- Fish sauce or soy sauce (3 tbsp): Fish sauce gives that umami punch, but soy sauce works beautifully for vegan versions—both do the job.
- Sugar (1 tbsp): A tiny bit feeds the fermentation process and balances the heat; it's not about sweetness but about chemistry.
- Korean red chili flakes or gochugaru (3–5 tbsp): This is where your heat level lives—start with three and taste your paste before committing to more.
- Rice flour (2 tbsp): When cooked into a paste, it creates a binder that keeps everything cohesive and adds a subtle, almost creamy texture.
Tired of Takeout? 🥡
Get 10 meals you can make faster than delivery arrives. Seriously.
One email. No spam. Unsubscribe anytime.
Instructions
- Prepare your cabbage:
- Cut your napa cabbage lengthwise into quarters, then chop into roughly 2-inch pieces—you're aiming for pieces big enough to stay intact but small enough to pack easily into jars. Don't stress about perfection; the cabbage is forgiving.
- Salt the cabbage:
- Dissolve your sea salt into cold water in a large non-reactive bowl (glass or ceramic work beautifully; avoid reactive metals that might flavor your kimchi). Add your cabbage pieces and toss to coat, then place a plate weighted down with something heavy on top to keep everything submerged, and let it sit for 2 hours, stirring every 30 minutes or so.
- Rinse thoroughly:
- This step matters more than you'd think—drain your salted cabbage and rinse it under cold running water 2 to 3 times, squeezing gently with your hands to release excess salt. The cabbage should taste seasoned but not aggressively salty; trust your tongue here.
- Make your rice paste base:
- Whisk rice flour with 150 ml of water in a small saucepan over medium heat, stirring constantly until it thickens into something resembling pudding, about 1 to 2 minutes. This cooked paste acts as a binder and adds a subtle silkiness to your final kimchi.
- Blend your spice paste:
- Once your rice paste has cooled completely, add it to a blender along with your minced garlic, ginger, chopped onion, fish sauce or soy sauce, and sugar, then blend until completely smooth. In a separate small bowl, stir in your gochugaru to your desired heat level, tasting as you go—you can always add more, but you can't take it back.
- Coat everything with care:
- In a large bowl, combine your drained cabbage, julienned daikon radish, sliced scallions, and carrot if using, then add your spice paste and grab a pair of kitchen gloves. Massage everything together thoroughly, working from the bottom of the bowl upward, until every piece is coated in that deep red, fragrant paste—this should take about 5 minutes and is honestly meditative.
- Pack into jars:
- Transfer your kimchi mixture into clean glass jars or a fermentation crock, pressing down firmly as you go to eliminate air pockets and ensure the vegetables are submerged in their own brine. Leave at least 2.5 cm (about 1 inch) of headspace at the top because fermentation creates pressure and gases that need room to expand.
- Begin fermentation:
- Seal your jars and leave them at room temperature, away from direct sunlight, for 1 to 2 days, remembering to "burp" them once daily—just briefly open the lid to release the pressure that builds up from fermentation. You'll notice the smell changing and deepening, and that's exactly what you want.
- Taste and store:
- After 48 hours, open a jar and taste your kimchi; if it's developed that sour, tangy quality you're craving, move it to the refrigerator where it will continue fermenting slowly. The flavors will deepen over weeks, and honestly, kimchi just keeps getting better as it ages.
 Pin this
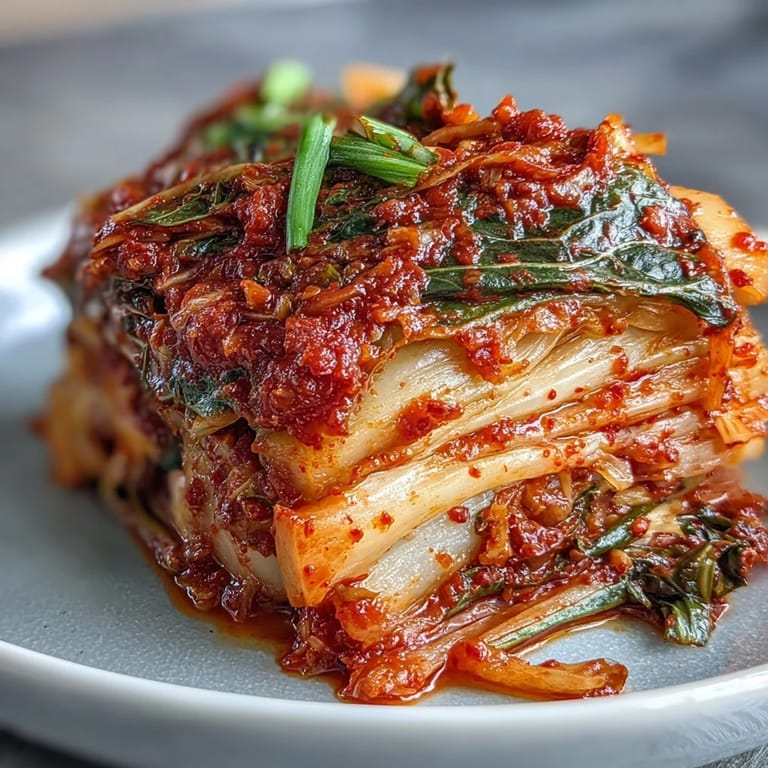
 Three weeks after that first batch, I found myself with five jars going simultaneously, each one at a different fermentation stage, and I realized I'd become someone who owns multiple fermentation crocks. My kitchen smelled permanently like a Korean fermented goods shop, and somehow I wasn't mad about it.
Getting the Spice Level Just Right
The beauty of making kimchi at home is that you control the heat with precision—I've learned that gochugaru varies wildly in intensity depending on the brand and freshness, so the "3 to 5 tablespoons" is genuinely a range, not a typo. My trick is to make a small test batch of spice paste first, taste it cautiously, and then commit to the full recipe once I know where my particular batch of chili flakes sits on the heat scale. Some people add a grated apple or pear to their spice paste for sweetness and mild fruitiness, which softens the chili's edges beautifully.
Understanding Fermentation Timing
Temperature is the invisible hand that controls fermentation speed—in a warm kitchen (around 20–22°C or 68–72°F), your kimchi will develop quickly and taste tangy in 2 to 3 days, while in a cooler space it might take 5 to 7 days or longer. I've found that the sweet spot for my kitchen is exactly 48 to 72 hours at room temperature, after which I move the jars to the refrigerator and let them age slowly for another week before they reach peak complexity. The slower you ferment it, the more sophisticated and complex the flavors become—patience is literally an ingredient here.
Storage and Beyond
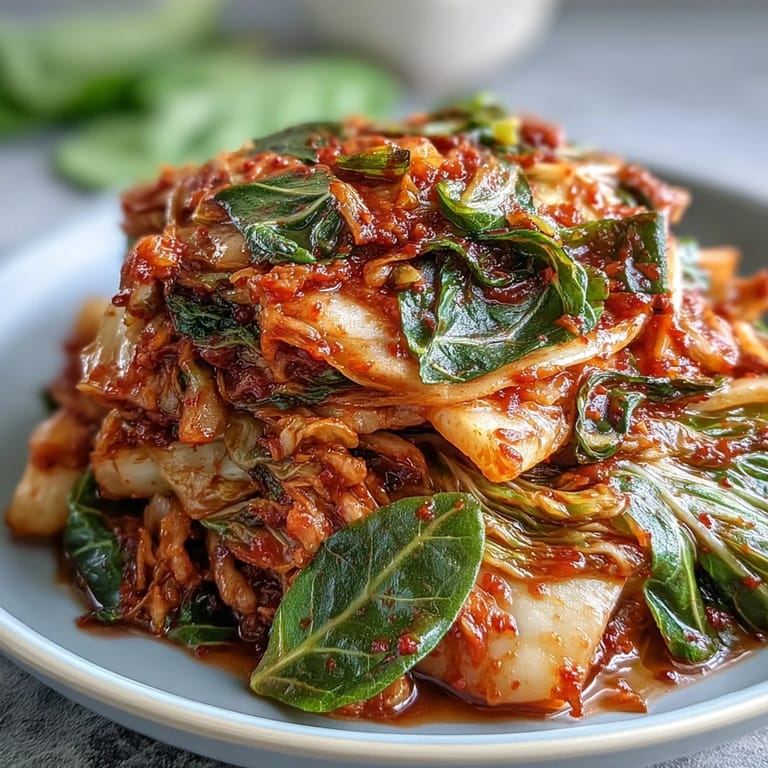
Once your kimchi is in the refrigerator, it will keep for months, though the flavors continue to evolve and deepen, becoming more sour and funkier as time passes. Some people love it young and crisp; others wait until it's been sitting for a month and tastes almost funky enough to stand on its own. Use it in soups, serve it alongside rice and eggs, eat it straight from the jar like I do, or even use it as a condiment for hot dogs and sandwiches because its brightness and spice cut through rich foods beautifully.
- If your kimchi develops a white surface film or mold, that's usually harmless kahm yeast—just scrape it off, but if you see fuzzy blue or green mold, discard the batch.
- Taste your kimchi regularly as it ages so you learn your own preferences and can judge when it's at peak flavor for your palate.
- Save the brine once you've eaten the vegetables; it's liquid gold for dressings, marinades, and the base for kimchi fried rice.
 Pin this
 Making kimchi is one of those kitchen projects that starts as a recipe and becomes a habit, then a meditation, then something you can't imagine not doing. There's something deeply satisfying about turning cabbage and salt into something that tastes like it contains the soul of a whole culture.
Recipe Questions
- → How do I know when my kimchi is ready to eat?
Begin tasting after 48 hours of fermentation. When the flavor achieves a pleasant tanginess and sourness that suits your preference, transfer to the refrigerator. The kimchi will continue fermenting slowly, developing more complex flavors over several weeks.
- → Can I make kimchi without fish sauce?
Absolutely. Substitute fish sauce with soy sauce or a dedicated vegan fish sauce alternative for a plant-based version. The umami depth remains excellent, and many prefer the lighter flavor profile that soy provides.
- → Why is rice flour used in the spice paste?
Rice flour creates a traditional porridge-like base that helps the spice paste adhere evenly to vegetables and promotes beneficial bacterial growth during fermentation. This small step ensures consistent texture and proper fermentation throughout the batch.
- → How long does kimchi last in the refrigerator?
Properly fermented kimchi keeps for 3-6 months refrigerated. The flavor continues evolving, becoming more sour and complex over time. Keep vegetables submerged under their own juices and always use clean utensils when serving.
- → What causes white spots on fermented kimchi?
White foam or spots on the surface are typically beneficial yeast colonies called kahm yeast, harmless and safe to consume. However, fuzzy or colorful growth indicates spoilage—discard the batch if you see mold that's green, blue, black, or pink.
- → Can I adjust the spice level?
Control the heat by varying gochugaru amount from 3-5 tablespoons. For milder versions, incorporate grated apple or pear into the spice paste, which naturally tempers heat while adding subtle sweetness that complements the tangy fermentation.