Pin this
 My friend texted me in a panic two weeks before her graduation: 'I want something that looks like I actually went to culinary school.' That's when I realized a cake doesn't just feed people—it tells a story of celebration. I started thinking about white chocolate, which felt elegant and modern, and gold accents that would catch the light when everyone gathered around the table. The vanilla sponge would be tender enough to feel special but simple enough that I wouldn't stress. What began as a text exchange turned into this stunning creation that somehow made her milestone feel even more real.
I'll never forget watching her face when she walked into the kitchen and saw this cake waiting on the counter. She actually gasped—not because it was technically perfect, but because it felt made for her, this moment she'd worked toward. That's when I understood why people fuss over celebration cakes; they're less about dessert and more about saying 'I see you, I'm proud of you' in butter and chocolate.
Ingredients
- All-purpose flour (2 ½ cups): Use fresh flour that's been stored properly—stale flour can make the cake dense, and you want something cloud-light for celebration.
- Baking powder (2 ½ tsp): Check your container; old baking powder loses its lift, and that's the difference between tender and tough.
- Salt (½ tsp): Sounds tiny, but it brightens the vanilla and keeps sweetness from feeling flat.
- Unsalted butter (1 cup for cake, 1 cup for buttercream): Room temperature is non-negotiable—cold butter won't cream properly and your cake won't rise right.
- Granulated sugar (2 cups): This feeds the creaming process and creates the tender crumb that makes people ask for seconds.
- Eggs (4 large): Also room temperature—they emulsify better and help create that silky texture.
- Pure vanilla extract (1 tbsp for cake, 1 tsp for buttercream): Pure, not imitation—the flavor difference is worth it on a cake this simple.
- Whole milk (1 cup): Room temperature milk mixes smoothly into the batter without shocking the temperature.
- Powdered sugar (4 cups): Sift it; I learned this the hard way when lumps ruined my buttercream consistency.
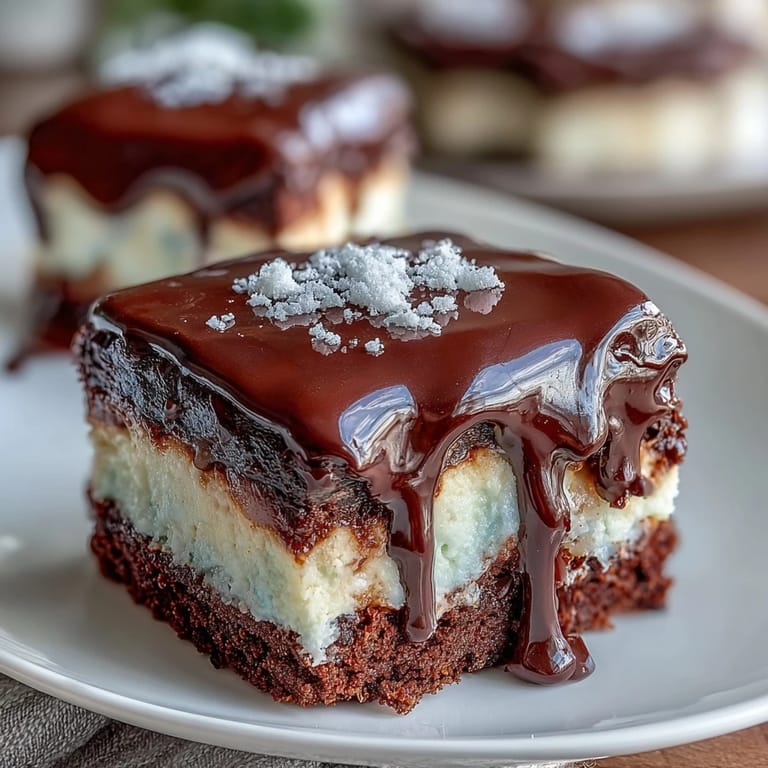
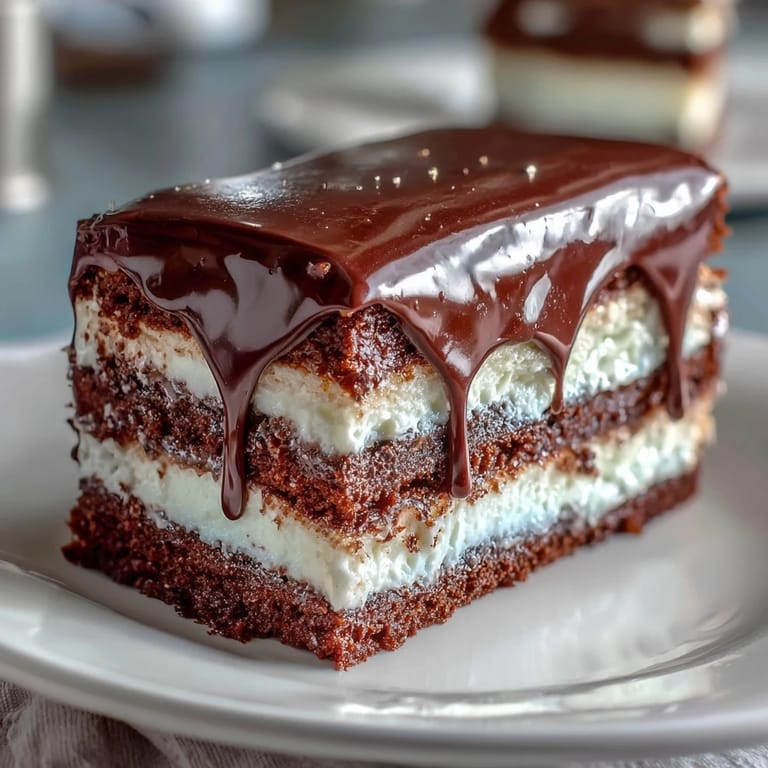
- White chocolate (6 oz melted for buttercream, 6 oz chopped for drip): Quality matters here because white chocolate can taste waxy—choose a brand you trust.
- Heavy cream (2–3 tbsp for buttercream, ¼ cup for drip): Cream adjusts the texture; add it slowly so your buttercream doesn't break.
- Edible gold spray or luster powder: This is what makes people pause and take photos—don't skip it.
- White chocolate crispy pearls or malt balls: These become your festive balloons; they need something to cling to, so the toothpicks are essential.
Tired of Takeout? 🥡
Get 10 meals you can make faster than delivery arrives. Seriously.
One email. No spam. Unsubscribe anytime.
Instructions
- Set the stage for success:
- Preheat your oven to 350°F and grease three 8-inch round pans, lining them with parchment paper. This is the moment where you slow down—rushing to line pans usually means wasted batter or uneven bakes.
- Build the dry foundation:
- Whisk together flour, baking powder, and salt in a medium bowl, then set aside. This prevents lumps from hiding in your final batter.
- Cream the butter and sugar:
- Beat softened butter and sugar together for about 3 minutes until it's pale and fluffy—this is where the magic starts, as air bubbles form that will make your cake tender. If it still looks grainy, keep beating; you'll feel the moment it shifts.
- Welcome in the eggs:
- Add eggs one at a time, beating well after each addition, then mix in vanilla extract. Each egg needs a moment to fully incorporate, or you'll end up with a broken batter.
- Alternate gently with flour and milk:
- On low speed, add a portion of flour mixture, then milk, then flour again, starting and ending with flour. Overmixing at this stage develops gluten and toughens your cake, so stop as soon as everything just comes together.
- Divide and bake:
- Split the batter evenly among your three pans and smooth the tops. Bake for 30–35 minutes until a toothpick comes out clean—every oven is different, so start checking at 30 minutes.
- Cool with patience:
- Let cakes rest in their pans for 10 minutes (this prevents them from falling apart), then turn out onto wire racks to cool completely. Rushing this step causes cracks and uneven layers.
- Create the silky buttercream:
- Beat softened butter until smooth, gradually add sifted powdered sugar, then pour in melted white chocolate, vanilla, salt, and 2 tbsp cream. The melted chocolate should be cooled—if it's hot, it'll seize and look grainy. Beat everything until light and fluffy, adding cream only if needed.
- Layer with intention:
- Level your cooled cakes if needed, place the first layer on your serving plate, and spread a generous layer of buttercream on top. Repeat with remaining layers, then apply a thin crumb coat and chill for 30 minutes so your final coat goes on smoothly.
- Coat generously:
- Apply a thick final layer of buttercream, smoothing the sides with an offset spatula and creating a flat or slightly domed top. This is your canvas for the drip, so take your time.
- Master the white chocolate drip:
- Heat heavy cream until it just starts to steam, pour it over finely chopped white chocolate, let it sit for a minute, then stir until completely smooth and glossy. Let it cool to room temperature so it firms up just enough to drip without running off the cake.
- Drip with drama:
- Using a spoon or squeeze bottle, drape the white chocolate ganache around the top edge of the cake, letting gravity do the work as it cascades down the sides. Fill the center with a pool of extra ganache and smooth it flat.
- Create gold balloons:
- Spray your white chocolate pearls or malt balls with edible gold spray (or toss them in luster powder), let them dry completely, then poke toothpicks or thin cake wires through them. Arrange them in a festive cluster on top of the ganache for that celebratory moment.
- Chill and serve:
- Refrigerate the finished cake until you're ready to serve, then bring it to room temperature for about 30 minutes before slicing so the flavors fully come through.
 Pin this
 Three days later, my friend sent me a photo of a single slice on a plate with a note: 'Everyone asked for the recipe.' Sometimes a cake becomes a thread that connects a moment—the graduation, the celebration, the feeling that someone took the time to make something beautiful. This one did exactly that.
Why White Chocolate Works Here
White chocolate buttercream has a reputation for being finicky, but it's actually forgiving once you understand it. The chocolate adds richness without the bitterness of dark or milk chocolate, and the vanilla sponge underneath stays the star instead of fighting for attention. I've made this with regular buttercream before, and it was fine, but the white chocolate version feels intentional—like you planned to make something elegant.
The Gold Balloon Moment
The gold accents are what transforms this from a pretty cake into a conversation piece. I spent way too long overthinking how to apply edible gold—spray versus powder, which products, how to make it stick—when really the answer is simple: whatever method you choose, let it dry completely before touching it. One friend suggested gold-wrapped chocolates instead of painted pearls, which is brilliant if you want something even easier.
Storage, Timing, and the Art of Planning Ahead
This cake is actually more forgiving than you'd think because the vanilla sponge holds moisture beautifully for up to three days in the refrigerator. I often bake the layers a day ahead, wrap them tightly, and layer everything the morning of the celebration—it takes pressure off and means fewer things go wrong. The buttercream can be made ahead and stored in the fridge for a week, so you only need to assemble on the day of.
- Bring the finished cake to room temperature about 30 minutes before serving—cold cake tastes muted and the textures don't shine.
- If you're transporting it, skip the gold balloons until you arrive at the destination, so they don't shift in the car.
- A long serrated knife dipped in hot water makes slicing clean; wipe the knife between each cut.
 Pin this
 Celebration cakes are less about following instructions perfectly and more about showing up for someone in a way they'll remember. This one does that every time.
Recipe Questions
- → How do I achieve a smooth white chocolate drip?
Heat heavy cream until just simmering, then pour over finely chopped white chocolate. Let it sit for a minute before stirring until smooth and glossy.
- → What’s the best way to prevent the buttercream from melting during assembly?
Chill the cake layers and crumb coat before applying the final buttercream layer to keep the frosting stable and smooth.
- → How can I create the gold balloon decorations?
Coat white chocolate crispy pearls or malt balls with edible gold spray or gold-dusted luster powder, then arrange on toothpicks or thin wires for placement.
- → Is there a substitute for whole milk in the sponge?
You can use any milk with similar fat content, such as 2% or a plant-based alternative, but whole milk provides the best tenderness.
- → Can the cake be stored before serving?
Store the cake refrigerated for up to three days, then bring it to room temperature before serving to enhance flavor and texture.